How To Play Like A Pro The Finals

Because of how difficult the game is, most players will focus on one or two guns or loadouts to try to maximize their efficiency. The more time you have spent on one loadout, the harder it feels to try to switch back to something you're not comfortable with. Because of that, players are losing flexibility and overall knowledge of the other weapons in the final.
Today I've built for you a quick article with one key tip for every single weapon and gadget in the game to try to give you insights as to what you can expect on a higher level for any weapon you could see yourself playing. Don't blink, because we're going to go fast, and every tip could be critical to your success in the game.
Gateway grenade: Gateway grenades can teleport players but also objects and keep their momentum; use this to safely bring vaults to cash outs. Aiming, r357 The 357 is the only gun in the game that doesn't have any recoil. You can shoot at any distance and as fast as you want without losing accuracy.

If you hit every shot in the head, you can kill up to four medium-class players, or one light, two mediums, and one heavy in a single. Mag model, 1887 You can increase the damage output at 15 M and above for the model 1887 by jumping while aiming down the sides. In SH1 1900, you can cancel the reloading animation to decrease the reload time by 30% by switching guns right after the shells are inserted.
Fant dagger If you hit a player with a right-click stab in the back, you will do a 340 damage hit, putting a heavy down to 10 HP in one single. Hitfrag grenade A frag grenade takes exactly 3 seconds to explode from the moment you press the trigger button. This can be extended indefinitely by holding the action button down.
This gun is completely nullified by the APs. Turret anti-gravity cube Instead of focusing on the gravity aspect of the gadget, use it to trap your enemies in a slow-down debuff. Area jump pad The jump pad can boost players but also tilt objects to reach unreachable places faster. Sword, if you press the evasive dash just as you release the charge blow of the sword, you add the sword damage to the entirety of your dash, making it twice as much.

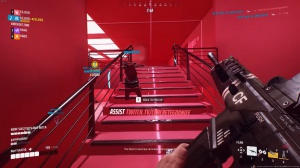
For effective APS turrets, the protection of the turrets goes through walls, floors, and ceilings. Use this wisely to avoid having your tower destroyed by a goo grenade. You can use the goo grenades to create alternative paths or safe areas for falling off a building. Example A gas mine getting hit by two gas mines doesn't increase the damage output per Successful Famas to increase damage output above the 10 m Mark aims at the middle part of the neck rather than the head; the gun recoil will no longer be an issue.
Data reshaping only objects that can be carried can be modified and reshaped zip lines. The maximum distance for the zip line is 40 m, except when moving. Platforms M60 If you hit all your shots in the head, you can kill eight and 3/4 medium classes. 6.5 heavies and 14 light classes with a single mag, Thermal imaging Thermal imaging is the only charged gadget in the game that can be active while activating another gadget, the Sledgehammer.

You can avoid slowing down while charging a heavy attack on the sledgehammer by sliding right after pressing your action. Button riot shield. The riot shield can parry a portion of explosive splash damage by protecting yourself at the right moment. Dome Shield: While defending a cash out, throw your Dome Shield on the cash out.
While it is under attack, enemies inside will see their shots blocked in the bubble, but you will still be able to shoot at them. Changing the gadget from a defensive to an offensive gadget is mine. You can double the damage output by adding two mines instead of one. Sa1 1260 Instead of pumping the shotgun after every four shots, give it a melee hit.
Not only does it considerably shorten the time loss between every four shots, but it can also add additional DPS. If you hit a player with the melee attack Bridge charge, the charge cannot be stuck on players; they will simply go through it. The gas grenade The damage radius of the gas grenade is 4 m; anywhere in these four meters, the potency of the gas is the same.

The only way to increase damage is with time. The longer the enemy player stays in the gas, the higher the damage per second. The XP 54 is the same as the SH1 1900. You can cancel the reload animation on this. Gun M1, from 15 M and above, the damage output of the gun is practically divided by two before the 15 M Mark; the damage is not impacted by mg32 like the CL40.
This gun can be entirely nullified by an APS turret. 93r uses hip fire at close range to be able to strafe while shooting; this significantly boosts your survivability while turning the gun recoil around and using it as a damage output. Booster stun gun Whatever jump slide or movement you do will not impact the accuracy of the stun, Sonar grenade There is no maximum distance.
If you are caught in the sonar, wherever the thrower is on the map, he will be able to see you. The LS gun is the most balanced weapon in the game in terms of damage. Fire rates vary in accuracy. Max size and reload speed glitch grenade Glitch grenades have just lost 50% of their effectiveness; the glitch effect has been reduced from 10 to 5 seconds.

RPG Use your RPG and its explosive Splash damage to bruise the enemy team and considerably bring their ttk down rather than to finish off a player pyro grenade You can use the flame generated by the Pyro grenade as a smoke screen. Players will not see you. Through the flames When throwing knives, the maximum distance at which you can throw your daggers is 50 meters with the charge.
Throw a vanishing bomb. The vanishing bomb can be used as a decoy to make the enemy think you were at one specific place and make him look in the wrong direction. You cannot shoot and hit more than one target per bullet. Fired lh1 The lh1 is one of the only guns in the finals with a time-two damage multiplier.
This is to compensate for the strong increase in recoil if you are moving or in the air. Defibrillator Both defibrillator skins have a distinct action to signify that the charge is ready with the basic skin. A ping is heard with the electric El wire, and a spark appears at the end of the cables. Barricades are unbelievably OP if comboed with an APS turret; the only way to consistently breach them is with a charge.

Deploy v9s The V9S has no shot. The cooler you are, the faster you can press the trigger. Repeatly, the lower the time to kill, ks23 You can break a wall with only three shots of the KS23. There you have it. I hope you had time to ingest every tip we put on the list today. If not, don't hesitate to go back, pause, and write them all down so you never forget them and become the most knowledgeable player out there.
I always appreciate and listen to every single comment.