These Are The Best Loadout Combos The Finals Season 2

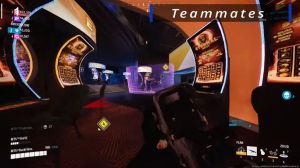
In this article, I'm going to go over some load-out combos and some gadget synergy that you can use to give you an advantage in the finals. So first up, it's going to be a pretty simple one; it's going to be zipline jump pads. I place a zip line here, and then I use it, and then afterwards I jump, and then I place the jump out.
That's going to give me a lot of extra momentum. I'm carrying my momentum over from the zip line onto the jump pad, and it's just going to allow you to get like a really, really B speed boost, and you're probably going to be able to cross the map pretty quickly by doing this, of course. A lot of these are going to work if a teammate has a jump pad, and maybe you have the zipline, or vice versa, and the zipline jump pad movement.
Things would also work with just the jump pads that are normally there in the arena or the zip lines that are normally there in the arena as well. So then we have the guardian turret and the ABS turret, so if you place the guardian turret and then place the aps turret directly in front of it, if you set this up in a good position like in the corner of a room or something where someone can only really shoot at the turret from one angle, then this is going to allow someone.

It's going to force someone to shoot the APS turret before they shoot the guardian turret, unless they aim at the top of it, which might be a little bit hard to do, and the guardian turret's also going to be protected from bombs and stuff, so you're going to have a tough time dealing with that APS turret because the turret is also going to be shooting at you, and even though the guardian turret isn't fantastic, this is a little combo that you can do to make it a little bit harder for the turret to be destroyed, if you want to.
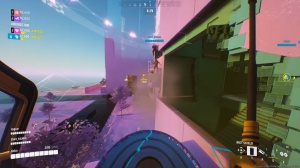
So for the light, we're going to have the gateway and any type of throwable, so if I Chuck two gateways there, let's say this is like a room outside a cash out room, and the other one's a cash out room, you got to watch out for that, but this is going to be a good way to throw in some nades of some sort and get some damage on the other side.

It does carry the momentum forward, so you got to watch out for that, but this is going to be a good way to throw in some nades of some sort and get some damage on the opponents, wherever the second gateway is. Then we have smoke grenade and thermal vision, so if I use this normally, I'll throw a smoke grenade, and you're going to be able to see that I can't see this enemy at all.
I can't see that dummy at all. I didn't make a proper throw, so I'll make a proper throw. I can't see that dummy at all, and now I'm going to pop on my thermop. Well i can actually kind of see a little bit through the smoke, but it's very, very difficult to see them, so I'm going to turn this on, and now you can very clearly see through the smoke, and if I turn it off again, you can't really see them at all, so if you're someone who wants to run smoke grenades, then you can, and pairing it with therm Vision can be very annoying for teammates.

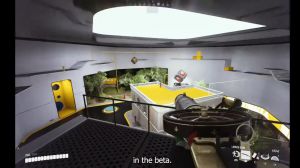
I mean for enemies, because you're just going to be able to see through the smoke and they're not going to be able to see through the smoke, so then we have the goo gun barricade, movement. Kind of method, so you place a barricade, you place one goo kind of in the center of the barricade, the second goo wherever you want to go, the direction you want to go in, and you pick up the barricade, and you go quite far, so it's a little bit Niche, but if you get used to doing it quickly.
I'm going to try and do it as quickly as I can, so if I place one here and I want to go left. I'm going to try to pick it up. You know, it doesn't take so long to set up, and it does bring you pretty far, so you can just get on top of buildings and stuff like that, so that's one thing you can do with a goo gun.
Obviously, you can pair the flamethrower with some types of goo. So if I pair the flamethrower with the goo gun or with goo grenades themselves, let's say I throw this into a room, and I just want everyone to be on fire, and I just set that flame that's going to spread if there's more goo so I can make some more goo happen, kind of spreading it to where I want; it's just going to keep spreading.

And then you know maybe I can clear out a room with some fire or something like that, so flamethrower, and any sort of Goo is obviously going to be quite good as well, and then we start getting on to kind of the more complicated stuff, so let's say there's a cash out right about here, and I want this cash out to go up onto the next floor because maybe the next floor is more defensible or something, so I'm going to Chuck this anti-gravity.
Cube down, let's pretend the cash out starts flying upwards, and then let's say I have a medium on my team that also has a dematerializer. I'm going to dematerialize the roof to make the cash out go up, and then I'm going to close the roof off. Now the cash out is going to be on the second floor, and maybe it's going to be easy steel or something like that, and you can try and defend it afterwards.

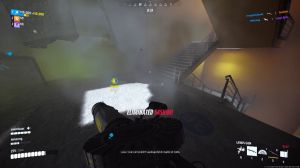
Now this is going to get a little bit away from synergy and more to do with just kind of a cheesy strategy, which is to place two explosive mines, or however many explosive mines you want really, and then use a spray, and that just makes it a little bit more difficult for the mines to show. If I pick up the second one, you'll see that the first one is pretty difficult to see.
You can see it beeping still, but it definitely hides it just a little bit more. Similarly, you can also place some explosive mines, and I'm going to pick up this jump pad and place it on top, and you're really just not going to have a fantastic time being able to see that you can see the beeping still, but it's quite hard to see.
I think it's only with this UFO skin that this works best, but I think it does still work a little bit with the other jump pad skins too. The problem is, you know, it's probably quite unlikely someone's going to go on the jump pad, but you might end up getting a kill with it. Also, this is not going to be as effective, I think, but you might get a couple of kills with that as well if you like explosive mines.

Also. I might as well mention it, but I think it's probably quite well known at this point, but if you just defibrillate someone, it's always very good to heal them afterwards to get them back to full health, so defibrillator and healing beam pair very well together, but yeah, that's pretty much it.
I just wanted to offer a couple of tips for some gadgets, some gadget combos, and things like that for anyone who maybe didn't know about them. So, there you go. That is going to be it for this article.