1 Tip For Every Ability The Finals

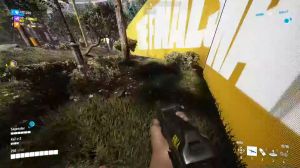
There is actually a way to tell whether you have a C4 active, primed, and ready other than by literally looking right at where you actually put it. When you throw a C4 out, the C4 detonator in your hand will emit an orange light. Once the C4 is primed and ready, that light will turn blue. This means that if you have C4 on the point to deny a cash out but you can't peak it without risking dying, you can just take a look at The Detonator to decide whether you can activate the C4 remotely or if it has been blown up and you have to step in and cancel the cash out yourself, which is pretty good to know, and if you like that tip, here is one tip for every ability: In the finals, the stun gun has a near 100%, if not 100%, accuracy when firing it from the hip, and since the iron sights for the stun gun are pretty difficult to use, this means that you should hip-fire with it all the time.
Also, a quick extra tip for the stun gun: if you aren't sure if your enemy is in range of your stun gun or not, just ping them. The ping keeps tracking them for about a second or so, and as long as they are within 12 meters, they will get stunned. My best tip for the flashbang is to swap it for something else.
The grenade is one of the few grenades in the game that actually blows up when it reaches the end of its visual trajectory. You know this line, and you can use it to your advantage by lining up grenades ahead of time and having them blow up the second that they reach the target without said target having time to actually get out of the way.

In other games, these are most commonly known as insta nades, vert nades, or sky nades because of the way the finals calculate, hit boxes, and most importantly, hurt boxes. This means that the evasive Dash allows your melee sword or even dagger attacks to deal damage to an enemy as long as you dash close enough to them during the time in your swing animation where you would deal damage.
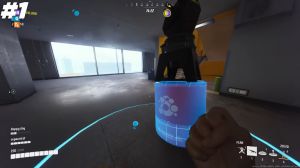
Even better, if you dash through an enemy while going for a backstab with the assassin's dagger, you can pull off a backstab without even needing to turn around. The jump pad can be used for a lot more than just giving your teammate a chance to bounce around. It can actually be placed against walls, which means that if you put it close enough to the edge, you can block an entire vent doorway or window.
You can even step up behind it and use it as a head glitch for additional cover. My tip for the defibrillator is based on something I see a lot of mediums doing for no reason if there's no pressure on your team. Hell, if your other teammate is already reviving someone, don't waste your time on the defibrillator to get them back up.

The cooldown is really long, about 45 seconds, and odds are you're going to need it later. The ponade can be thrown against walls or ceilings, which will immediately cause damage and ignite anyone who touches it. On the other side, you can activate your cloaking ability right after shooting, meaning that you theoretically could fight an enemy with the saw of a shotgun with them barely seeing you as you activate it.
As soon as you fire a shot, you'll also be surprised at how many enemies you will catch off guard by beaming one of their teammates and then immediately going invisible the moment that they are dead. The barricade is really tall; in fact, it is so tall that only the heavy can see past it, so as a heavy, you can place the barricade, stand behind it, and only have your head poke out over the top, giving you a guaranteed positional advantage.
Advantage thanks to something that's called a head glitch If you place a zip line where one end connects to a moving target, the zip line will stay up between the two attachment points even if that one target keeps moving until the line of sight between the two attachment points is broken. This means that you can make zip lines to get on moving platforms.

Or on top of cranes, basically on two more things than you initially think: the explosive mine on its own doesn't really pack enough damage to secure a kill, but if you put two explosive mines either on top of each other or close enough where one of them exploding will set off a chain reaction and detonate the other, you can easily deal over 280.
Damage in one explosion, which one shot lights and mediums, the sonar from the sonar grenade goes through walls, so in more cases than not, you're better off throwing it near a wall or other obstacles to give you information on the other side since throwing it right on top of a team gives them a chance to glitch it or get out of the way, and why would you need information on a team that's right in front of you?

The guardian turret takes 4 seconds before it's activated after it has been placed, so if you use it mid-fight, it will get destroyed before it even activates. But if you place the turret inside of a building, behind the door, and then open the door after those four initial seconds are up, you'll get the element of surprise on your enemy and free damage from the turret anyway since you can use the vanishing bomb on not only yourself but also your teammates.
Always remember that you can throw the vanishing bomb at a teammate who is stuck in a bad spot or who has to cross an open area with a lot of enemies. You'll be surprised at how many lives you can save just by paying attention to your teammates. The main strength of the charge and slam will be countering enemy heavyweights and barriers.
The slam that you get from activating the charge and slam after charging, or when activating it midair, will deal damage to any enemies in range, even if they're behind shields. If the enemy is behind shields, all you need to do is have your slime go through the shields to actually deal damage to him.

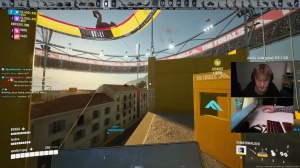
There are a lot of tips I want to give about the breach charge because whenever I play and stream on Twitch or TV, you guys always ask, Why are you running the breach charge instead of anything else? The best tip or reason that I can give for the breach charge is one simple strategy. I call it ice fishing.
If you can find high ground or a roof above an enemy team, you can use the breach charge to create a small hole, which gives you great angles on your enemies. If you have good enough aim, you can get at least one kill before they even notice the hole, and even if they do notice, you will have a head glitch or superior position on the enemy while they are usually stuck in the open, which gives you a massive advantage in trading shots as well.