The Finals: A Complete Guide To Pyro And Ieds
Intro - meet bracco and the ied

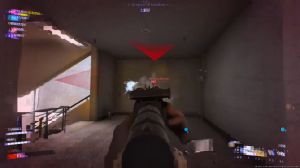
This unsuspecting opponent goes by the name of Braco. In this moment, Braco doesn't know it, but they are about to be instantly deleted by the IED. I'm carrying it in my hands anyway. We'll come back to Braco and the IED later in the article, but suffice it to say that this article is all about taking a close look at fire and some explosions in the finals and various ways you can use pyro grenades, mines, the flamethrower, and flammable canisters to your advantage.
Get a rock hand here. Fire has a couple of main uses in the finals and, to be fair, a couple of varying behaviors in the same style as my last article, which is a guide to toxic gas. In this article, I'll run through some facts about the fire-making gadgets, thrower balls, and flamethrower first, and also look at some tactics for using them in games at the same time.
Fire can be used to directly damage your opponents by igniting gas and vegetation and, in some instances, exploding mines and other canisters. Although you'll see quite a few of these interactions, Depending on the source of the fire, Okay, let's look at the pyrro grenade.
Pyro grenades, pyro mines and flammable canisters

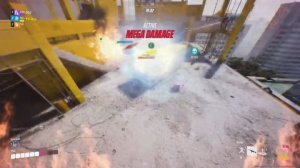
Pyom mine and flammable canister first, just like the toxic gas options. The pyrro grenade mine and flammable canisters flame effects all have a 12C duration; they cover a smaller area than toxic gas, though as you can see in this comparison between a gas grenade and a pyro grenade compared to one another, the Pyro options do cover the same area and all deal the same amount of fire damage while you're in the flames, which is 35 HP per second.
However, the flammable canister and pyom mine both also do explosive damage to you if you're standing next to either of them when they explode. The flammable canister does up to 100 HP of explosive damage, and the pyom mine does up to 70 HP. That explosive effect will come in useful when we look at the IED later on.

Just like toxic gas. The damage effects from the fire from all three of these pyro sources are not cumulative, so any explosive damage aside from being in the flames of one of them is identical to having all three of them burning at your feet. This means that the most efficient use of pyro devices when used by themselves is to either keep them a distance apart or simply keep them in reserve for a follow-up.
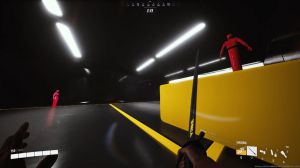
When it comes to burning, however, in most instances, your opponents are going to run through the flames because they won't just hang around in the middle of The Inferno until they're dead unless they're close to completing a Cash Out Steel and want to take the risk of not moving. Therefore, because the heavy build moves more slowly than the medium and light builds, they do incur slightly more damage when passing through the flames.

A heavy sprint through a pyro grenade, for instance, will incur 60 HP P damage, whereas medium and light only incur 55. So keep that in mind if you're thinking about a full send. Through the flames, the flip side, of course, is that if you're throwing a pyro grenade, you should expect players to make it through the flames onto your side most times, but then you can always pre-drop a mine on your side of the flames in preparation for them running through, and there's a good chance they won't see that as they exit the pyro.
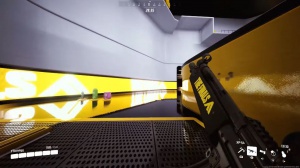
This can work really well in bottleneck locations, like steer wells or doorways, and there's a very good chance that your mine will be triggered. The flames from a pyrro grenade and mine and flammable canisters have varying behavior when it comes to moving platforms, and this is something I should have also talked about when covering toxic gas.
Too, if you throw a toxic gas grenade on a moving platform or have a gas mine set off, the gas will remain in one place and the platform will move through it, as you can see here, so it's good to be on the front end of the platform, throw the gas at your end, and let it defect opponents on the other end as the platform floats along pyom mines and flammable barrels, and also behave exactly like gas with the platform moving.
Through the flames Pyro grenades are different, though if you throw a pyro grenade on a platform, the flames will stay in the same location relative to the platform and travel along with it, so keep those differences in mind when using various pyros on moving platforms. If you throw pyro grenades or pyro mines on a ceiling, both will do damage to players on the floor above, so this can be useful if you want to have one of your team members defend your cash out from the floor below while the remaining teammates defend from the same floor as the cash out or the floor above. Just remember that you need to trigger the pyro mine yourself by shooting it, and as I mentioned in my toxic gas guide, if you're using the pyro grenade to clear gas from around the cash out I recommend throwing it to one side of the cash out as it will still kill the gas as long as the flames are in the outer part of the cloud, but it won't block you from stealing.
The flamethrower

Okay, let's move on to the flamethrower. The flamethrower is a primary weapon for the heavy build and is designed purely as a short-range weapon. According to the finals on Wiki, it reportedly does 89 HP of damage per second. It operates for up to 10 seconds on one fuel canister before requiring a 3.5 c.
Reloading time, as well as burning your opponents, will also trigger all canisters and mines to explode. Here's what the flamethrower looks like when it's being pointed at you compared to when you're using it. The flamethrower can be used to quickly clear an area of toxic gas, igniting it within about a second.

As long as there's no smoke or powder present, it can also set fire to goo, destroying it in 6 seconds. The flamethrower is good in close quarters, but its ultra-short range makes you pretty vulnerable if you get caught out in the open with no nearby cover or any form of shield. This vulnerability means that it's often paired with the RPG to provide the user with an alternative, longer-range weapon.
Another combination that works pretty well with the flamethrower is to use it as a follow-up to the charge and slam with that specialization. Not only is it used to bust through walls and damage opponents on the other side, but it is also used as a way to rapidly shorten the distance between you and your opponents, bringing them within the flamethrower.
Very short range Despite using that combo as a way to partly overcome the very short range of the flamethrower. I'm currently not a fan of the weapon because that short range is more often an issue than not being heavy if I'm going to choose a short-range weapon. I prefer to go with the sledgehammer, with its ability to rapidly destroy buildings, and if I choose the sledy.