Ultimate Lh1 Masterclass & Aim Training Guide. Mnk & Controller - The Finals

If I had to describe the LH1 to you guys in one phrase, it would be high-risk. high reward because, in the right hands, this gun can absolutely decimate entire squads, or at the very least leave them reeling, making it an easy cleanup for you and your teammates. I'm going to be honest with you, though learning this weapon and getting to a point of consistently dealing maximum damage is not an easy feat because it is a balance of patience, pacing, and positioning.
But don't worry, because in this master class, I'm going to break down every aspect of the lh1 from the mechanics of the weapon. It's a small button for you, but it means the world to me and makes a tremendous impact on my channel. Also, don't forget to hit that notification bell. And subscribe for all things to finals as usual.
Lh1 explained

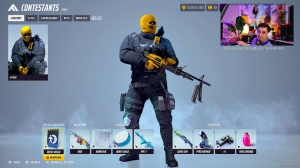
The lh1 is a light weapon that has massive damage potential but is offset by its barely manageable recoil and visual clutter. However, with a little bit of time and understanding, you will acquire a skill trait that will set you apart from the rest of the player base, unlike the XP54. Not just any player can pick up this weapon.
Yes, you may be able to pump out a few kills, but can you do it on a consistent basis? Can you maintain that level of damage in time to kill in eight out of 10 engagements? Can you reproduce the same amount of damage at far range that you can at medium and close range? These are the factors that can separate a good lh1 player from a deadly one that can do devastating damage to multiple players or even entire squads, so to make the process of learning this weapon a little easier.
Patience

I've come up with the rule of three PS: patience, pacing, and positioning. If you follow these rules, your accuracy and efficiency with this weapon will double in no time, so let's start with patience. This weapon has a base damage of 49 and can crit for 988 damage with an RPM of 300. It can kill a light in 6 seconds with body shots and 2 seconds with crits, with just two to four shots to kill, a medium at 1 second for all body shots and 4 seconds for all crits, with three to six shots to kill, and a heavy at 1.4 seconds for all body shots and 6 seconds for all crits.
With a staggering four to eight shots to kill, the damage drop-off minimum range is 80 meters, and the maximum range is 100 meters. This gun has the same amount of range as the sniper but with a much faster time to kill for both medium and heavy now that we have a little bit of perspective, and know that each of these shots will take a massive chunk of Health from the enemy you understand now that you don't necessarily need to spam fire this weapon in order for it to be effective, you can take your time and engagements to micro adjust if the visual recoil is starting to obstruct your view this especially applies to Mid to far- ranging engagements, if you realize that you missed more than two consecutive shots take your time to readjust to make sure that the target is centered having the understanding that even though your fire rate is below 300.
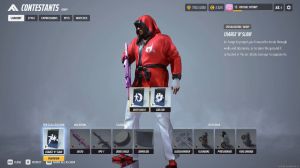
This gun's time to kill still beats the vast majority of guns in the game, so it is okay to be patient to ensure that your opponent is exactly where they need to be. On a side note, if you're using the 8-bit comeback skin, just know that this is currently paid to lose due to the muzzle flash causing unnecessary visual recoil, making this weapon harder to handle than it already is.
Yes, I personally use a skin because I'm a masochist, and B is one of my favorite skins in the game, so with that in mind, use it at your own risk. If you want the most optimal skin, you can use the default one along with its color variations.
Pacing

Now , we're moving on to pacing, which goes hand in hand with patience. Pacing can slightly vary from person to person depending on how fast you can click your mouse or trigger, but there is a universal threshold that, if you go beyond it, will cause you to miss over 90% of your The key is to find a pace that is comfortable for you to consistently maintain but does not go beyond this threshold.
I recommend maintaining a fire rate between 270 and 290 RPM, which should look something like This: Pacing your shots will allow you to manage the visual recoil and microjust; if need be, you could even go as low as 260, but then you run the risk of other weapons damaging you once you have found the fire rate, or should I say rhythm, that you're most comfortable with.
I want you to strictly maintain it during the trainy routine later in this article unless specifically instructed otherwise, as well as for all your engagements in game. This is to help rewrite the figh ORF flight response of firing as fast as you can when in stressful situations.
Positioning

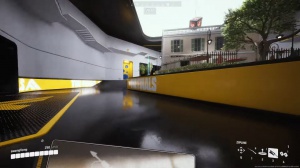
Now, lastly , we move on to positioning, and I'm going to break this down to you in two categories: the position of the reticle and the position of the player if you're just starting to use the weapon or just not used to it. I highly suggest that your reticle be at chest level because getting used to the recoil of this gun, whether you are on M&K or controller, is not an easy task in live engagements.
I'm not going to be one of those channels to tell you just to memorize the recoil pattern because 99.9% of players are not thinking about which way the bullet will stray in the middle of an engagement, and if they are, they are probably already dead. Aiming for the chest will allow us room for error, and that is the name of the game: to acquire as much room for error as possible in order to compensate for this weapon's volatile behavior, whether it be through pacing or reticle positioning.

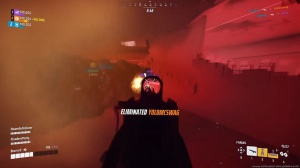
Now, when the recoil starts to kick, I want you to then utilize recoil smoothing by counter-strifing to compensate for the rest. Now, in terms of player positioning, when engaging opponents at mid-range or even a sniper at far range, if you go below half the mag and your enemy is not below half health, follow this rule of thumb.
Retreat, recalibrate, and reposition because odds are you are leaving yourself wide open to be attacked from different angles due to the amount of time it takes to completely unload the entire mag. I can guarantee you that eight out of 10 times you will either be killed by one shot or even flanked.
So stay proactive, ensure that you're always moving, and learn when to live to fight another day because no one is useful to their teammates. When they're dead now in close ranges, things can get a little bit tricky because the L1's, unlike their peers, have some of the worst bullet dispersion in the game.