Ultimate Lh1 Masterclass & Aim Training Guide. Mnk & Controller - The Finals

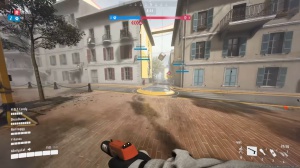
You have to be literally kissing your opponents to land your shots. Instead, try to maintain 10 to 15 feet of distance while firing ads and utilizing some sort of cover when getting into an engagement to negate as much damage as possible because if you're taking them head-on 5 to 15 feet away, you will either be left with one shot trade or completely be decimated by any medium or heavy that has somewhat decent aim regardless, if you stun them or not now in the case that you do not have any cover and have no choice but to engage the opponent.
Get up extremely close to them, keeping them centered while moving around the character model. This is even more effective against heavy classes, being that it can get very disorientating when you not only have to track a light moving at high speeds but also have to look down while doing it. I want to say a disclaimer: though this is a very high-risk move, and you probably will have a 50-50 shot of making it through the engagement alive, 50% is better than nothing, so before we get started with this training routine.
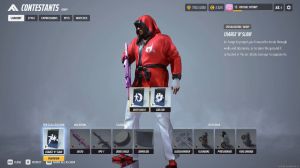
Training routine prerequisites

I want to let you guys know that training with this weapon is the same for both inputs because the lh1 is more accurate when acquiring a target by centering it than aiming down sights.
This will minimize the number of micro adjustments needed for M&K and, at the same time, utilize the benefits of Target snapping for the controller. Managing recoil is also the same for both inputs: pulling down and counter-strafing to activate recoil smoothing as well as an assist for the controller.
Now that we have that out of the way, let's get started with this LH1 aim training routine.
Lh1 training routine
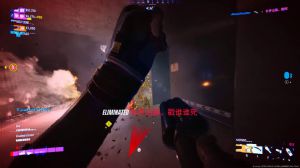
3 2 , 1. If you've seen or used any of my guys before, you know that we always start up with a centering warm-up, but this time it's with a twist because, like I said before, hip firing with this weapon is absolutely atrocious unless you are right up in the opponent's face.

So what we are going to do is keep the target centered at all costs and hip fire when they're right up close, then start to ads when we're 2 to 5 feet away, moving around the target and constantly repositioning, making ourselves as elusive as possible, crouching or sliding, because along with horrible hip fire, the inair accuracy is just as bad.
I want you to do this for 5 minutes, so before we move on to our first exercise, we need to find out the shot rhythm we are most comfortable with, which can lie between 70 and 290 RPM. This will again vary from person to person depending on how fast you are able to click the mouse as well as how consistently you are able to do it.
This is how the shot Rhythm should sound and look. Compared to something above 290 RPM, as you can see, the speed reduction is very slight but has a significant difference that is even more pronounced the farther away the target. What I want you to do now is find the shot rhythm that you can consistently reproduce.

When you find that out, add a layer of recoil control on top of it by slightly pulling down while completely unloading your mag. Do this for 5 minutes. This rhythm should be strictly maintained in all your scenarios and brok in only to recalibrate your aim when the visual recoil has lost the target's line of sight.
The only exception to this rule is in our very last scenario when engaging a target at very far ranges, where you have no choice but to drastically decrease your RPM in order to land consistent damage on the target. So now that we know our shot rhythm, let's start with our first scenario, stationary mid-range dynamic tracking.
I want you to stand still near the back ledge and off the mat while using your shot rhythm and slightly pulling down the track for the first dynamic, aka moving. Target, Eliminate 10 targets before moving on. Next. I want you to remain at this distance and add a layer of movement by utilizing counter-strafing to eliminate the target 10 times while maintaining your shot rhythm and slightly pulling down before moving on to far-range engagements.

Get on top of the ledge and perform the same two scenarios on the farthest moving target, eliminating it 10 times while standing still and another 10 while counter-strafing, all while again maintaining shot rhythm and slightly pulling down. If keeping a constant rhythm is too hard for you when tracking this target, you can split up this rhythm into two four-shot bursts, allowing you to readjust and recalibrate the reticle in between bursts.
Now the next two scenarios are going to revolve around target switching. We're going to get on the mat near the barrier. In this scenario, we're going to be constantly moving and eliminating the first moving target as well as one of the light targets in one clip. When you switch targets, make sure you get rid of the ads.

Center the target, then go back into ads; this will help you recalibrate and make the process of acquiring your target very fast, minimizing the amount of micro adjustments needed to lock on also on the controller. Again, it will help you build the habit of fully utilizing target snapping. This essentially eliminates most of the micro-adjustments when acquiring your target.
As usual, I want you to prioritize counter-strafing against the moving targets and to maintain your shot rhythm. Clip each pair 10 times. If you want to add a layer of difficulty, replace the light target with the heavy target, and then proceed to One clip, both medium and heavy targets; five more times.
For the next target switching scenario, I want you to make your way back to the ledge, giving you an entire view of the firing range without any of the targets overlapping each other. Next, shoot one bullet into each target, going in and out of ads when switching, just like in the last scenario. Again, remember to center while in hip fire, then ads to minimize the amount of micro adjustments.

Do five sets of shooting at each target from front to back before moving on. Now we have finally arrived at our very last scenario, where we are going to first jump onto the heavy class and destroy this portion of the building, then get to this back wall here on the upper ledge when you have nothing obstructing your view, then hop back on light, utilizing a much slower rhythm, and try to maintain a constant DPS while tracking the first moving Target eliminates the target five times to complete the routine, and that's about it.
As you guys could already tell from all the scenarios, the key to the lh1 is to prevent your fight ORF flight responses from taking control in stressful situations, causing you to spam Fire. Don't forget to subscribe for all things finals and to ring the notification bell so you don't miss any upcoming masterclass articles.
[Laughter]